


I firmly believe that people any age can use an online business to gain financial freedom and fuel retirement. But if you’re just starting out in the online business world, it can take time to learn the ropes. You might think it’s all up to you to run every aspect of your ecommerce business, but you’d be wrong.
There are plenty of ways to get things up and running fast with the help of third-party services. FBA is one of them. Read on to learn how to sell on Amazon FBA for beginners.
What is FBA (Fulfillment by Amazon)?
One of the challenges of running an ecommerce business is navigating the logistics of storing your products and shipping them to buyers. With FBA (Fulfillment by Amazon), you can avoid this headache. Instead, you’ll store your products with Amazon and they will pack and ship them for you. FBA also has a lot of other benefits as well:

With FBA, you won’t have to worry about shipping your products on time– Prime members can receive your products at their home in 3-5 days.
Interested? This guide will show you exactly how to sell on Amazon for beginners using FBA.
How to Sell on Amazon for Beginners
Step 1: Find your products
If you already know what products you’ll be selling, skip ahead to step 2. If you don’t know, then first you’ll need to conduct your product research. There are two main ways you can sell products with FBA:
- Private labeling
You create your own brand label that you apply to products and sell on Amazon. You’ll need some initial capital to order these labels.
- Retail arbitrage
Buy a brand name product and resell it on Amazon for a profit. This is the easiest way to make fast money.
- When choosing products, you’re going to want to:
- Identify a popular product category on Amazon.
- Look for gaps in the available product listings that you can fill in terms of price and variety.
I would like to stress that the most successful products on Amazon FBA are private label and sourced in China—not retail arbitrage. The sourcing of products in from China can be a challenge but not impossible. If you would like to read further on this topic I suggest you read the MyWifeQuitHerJob.com blog. Steve Chou’s blog is an excellent resource.
Ensure you can turn a worthwhile profit based on your selling price.
I’ve discussed elsewhere in my drop shipping business guide how to find the right products to sell, and here’s another excellent article that will help you with niche selection: How to Find Profitable Niches: Do Less While Earning More.
Step 2: Create a seller account
Before you do anything else with FBA, you need to set up an account. Go to Amazon.com and scroll down to the bottom of the page. Under the “Make Money with Us” section, click “Sell on Amazon”:

This will take you to the FBA signup page, where you can read about how Amazon can help you with ecommerce. Click “Start selling.”
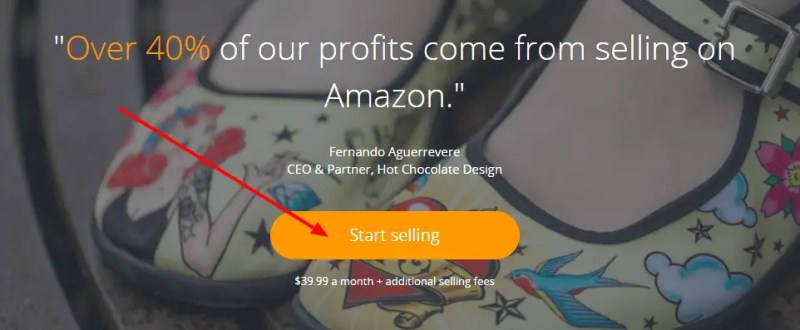
Then you can sign up and create an account. The base fee for Amazon’s FBA service is $39.99 a month. You may pay more depending on the amount of products you plan to sell.
You’ll need to provide basic e commerce information such as your charge method (how people will pay for your products) and seller information. You’ll also need to verify your identity through text message or a phone call.
When filling out your seller information, you’ll also chose a display name. People will see it when they shop on Amazon for your products, so make sure it’s branded and professional.
Step 3: List your items on Amazon FBA
Now you can list the items you want to sell with FBA. Log into your seller account, and click “Inventory,” then “Add a Product” from the toolbar at the top of the page.
- Next you’ll be prompted to search for your product. Unless you manufactured it yourself, it should be already listed in Amazon’s database and you won’t have to create a new product. You can type in the product barcode or name to find it.
- Next you’ll be prompted to fill out the price you want to sell the item and what condition it’s in. The price you choose should be based on the profit margin you want and how your competitors are pricing their products.
- Under “Shipping Method,” make sure you select “I want Amazon to ship and provide customer service for my items if they sell.”
- On the next screen, read and accept the FBA terms of service (this only shows up for your first product).
Repeat the process with each of your products. Once they’re all in the system, navigate to the Inventory page and click “Manage Inventory.” In the “Actions” drop down menu, click “Change to Fulfilled by Amazon.”
Once you’ve done that, you’ll be asked to choose your preference between:
- FBA Label Service
With this service Amazon prints off and labels your items for you if you’ve opted for the Private Labeling business model.
- Stickerless, Commingled Inventory
This gives Amazon permission to ship the same product from another seller’s inventory when necessary. This helps keep the shipping process fast if someone else’s products are stored in a warehouse close by. This only works if you’re not using any branding on your inventory.
After making that selection, you’ll choose between:
- Convert Only
If you plan on shipping more than one product to Amazon FBA, pick this option so you can add more items.
- Convert & Send Inventory
Choose this if you’re only sending one product so you can proceed directly to setting up your shipping plan.
Once you’ve converted a product to FBA, you can see a breakdown of associated fees in the “Manage Inventory” section:

Step 4: Ship your products to Amazon
Once you’ve converted all your desired products to “Fulfilled by Amazon,” click “Convert & Send Inventory.” Amazon will ask you to provide your ship from address. This may be your home or a manufacturer’s address, depending on where your products are currently stored.
You’ll choose between two packing types:
- Individual products
- Case-packed products
Choose “Case-packed products” if you’re sending an inventory of identical products, such as a box of 10 Nike Air shoes. Otherwise, choose “Individual products.”

You’ll be prompted to add products to your shipping plan. You can search for them through your inventory. Once you’ve added them all, go back to “Inventory” in the main toolbar, then “Manage FBA Shipments” > “Continue with shipping plan.”
Next you’ll enter:
- How many units you’re sending for each item
- Whether your item requires any prep from Amazon
- Whether you or Amazon will label the product
In your inventory summary, you can select these services by choosing “Amazon” from the “Who preps?” dropdown menu. Then click Save:

If you go to “Inventory,” “Manage FBA Shipments…”

…then look at the View Shipments tab, you can see where Amazon wants you to ship the products.

In the Shipment Packing section, you will calculate the cost of shipping your products based on the box dimensions and weight. Then simply click “Print Box Labels.”

Print out your labels, put them on the box, and they’re ready to send.
Step 5: Start selling
You’ve already set up all the processes you need to sell your products using FBA. Now you can sit back and watch it happen! Once Amazon receives your shipment, your products will sell as long as the inventory lasts. Keep an eye on it so you know when to send more.
Selling Coach is a feature of your Seller Central account that can help you with this. It will remind you when your inventory has lower than optimal stock based on your sales data.
Selling Coach is a pretty cool tool to check out for a lot of reasons. It will also show you new selling opportunities based on products you already offer, or those you don’t offer but are in high demand. It also makes pricing recommendations.
Conclusion
If you want to learn how to sell on Amazon for beginners, FBA is a great place to start. It simplifies a lot of the e commerce processes for you, and gives you great options to grow your customer base with no extra effort on your part.
If you’re hoping to start an ecommerce business to fuel your retirement or gain financial freedom, FBA can help jumpstart your sales. If you’d like some help buying an established Amazon FBA website check our our post on How To Buy An Online Business For Retirement Income.